by zan@zeliciousrecipes.com | Favorite Recipes

Watermelon margaritas are a great summer cocktail! We made these on our girl’s trip in Mexico, but ironically it was hard to find fresh limes! Definitely start with 100% Agave Tequila, fresh limes and use seedless watermelon to save time. I always use Agave Nectar for my margaritas over sugar or simple syrup. My favorite tequila for margs, that won’t break the bank, is Espolon Silver Tequila. It’s a great value and perfect for mixing into a marg.
When it comes to measuring out my ingredients, I always start with the fresh squeezed lime, as it’s harder to squeeze limes than pour the tequila, or add the agave. Best to buy an entire seedless watermelon, and chop into pieces and place half into food processor. Save the other half to cut into wedges for garnishing the glasses. This recipe is a little different from the 1,2,4 margarita recipe I posted as we replace the soda water with the watermelon puree.
Measurements for a single Watermelon Marg:
- ½ oz. Agave nectar
- 1 oz. fresh squeezed lime juice (not bottled – please!)
- 2 oz. 100% Agave Tequila
- 1 oz. fresh pureed watermelon (No seeds!)
- Salt for the rim, and sprig of mint or watermelon wedge for garnish
Place all ingredients in a shaker with ice. Shake for 30 seconds at least, then pour into glass, with or without salt or a mixture of salt and sugar. I also sometimes add a sprig of fresh mint.
Measurements for a Batch of Watermelon Margaritas:
- 1 cup Agave nectar
- 2 cups fresh squeezed lime juice (not bottled – please!)
- 4 cups 100% Agave Tequila
- 2 cup Fresh pureed watermelon
- 2 large scoops of ice
Combine lime, agave, watermelon and tequila into a drink dispenser. Stir in the ice, making sure it is mixed well. Add a little bit of club soda at if you want to dilute it. Make sure to stir occasionally as the lime and watermelon tend to settle. Enjoy! And please drink responsibly!

by zan@zeliciousrecipes.com | Favorite Recipes, Smoothies

I try and start most mornings off with a healthy antioxidant green smoothie that has a balance of veggies, fruits, and protein. As I get older, I realize my body is not recovering from exercise as quickly as it used to, so I make it a point of including antioxidants into my diet that have anti-inflammatory effects, It may help lower the risk of heart disease, cancer and brain function decline. Here is one of my favorites; not too sweet, and has a little bite to it.
INGREDIENTS:
Spinach: high nutritional value and is rich in antioxidants. It is a good source of vitamins A, B2, C and K, and also contains magnesium, manganese, folate, iron, calcium and potassium.
Green Apples: a great source of fiber, vitamin C as well as minerals – iron, zinc, copper, manganese & potassium and high in antioxidants.
Ginger: helps with inflammation and digestion.
Cinnamon: contains large amounts of highly potent polyphenol antioxidants. The antioxidants in cinnamon have anti-inflammatory effects, which may help lower the risk of disease.
Hydrolyzed Collagen: Great Lakes Gelatin has my favorite type of Collagen powder, it provides 11 grams of protein, is non-GMO, water soluble, and unflavored, so will not change the taste of your smoothie. It has claims that it “helps regulate the body’s metabolism by providing protein of low molecular weight that is quickly absorbed in the digestive tract. It contains amino acids such as glycine, lysine, and proline, which are important amino acids and can be used by the body to build connective tissue structures to support the functions of the cells. Collagen is important to nitrogen balance, and may prevent age related cartilage damage and collagen loss.”
Vanilla Stevia: Just 5 drops is as sweet as 1 tsp of sugar, with the added taste of real vanilla extract.

by zan@zeliciousrecipes.com | Salads, Vegetables

Kale Salad with Togarashi, Apples, Pecorino, Sweet Almonds and Dried Cranberries
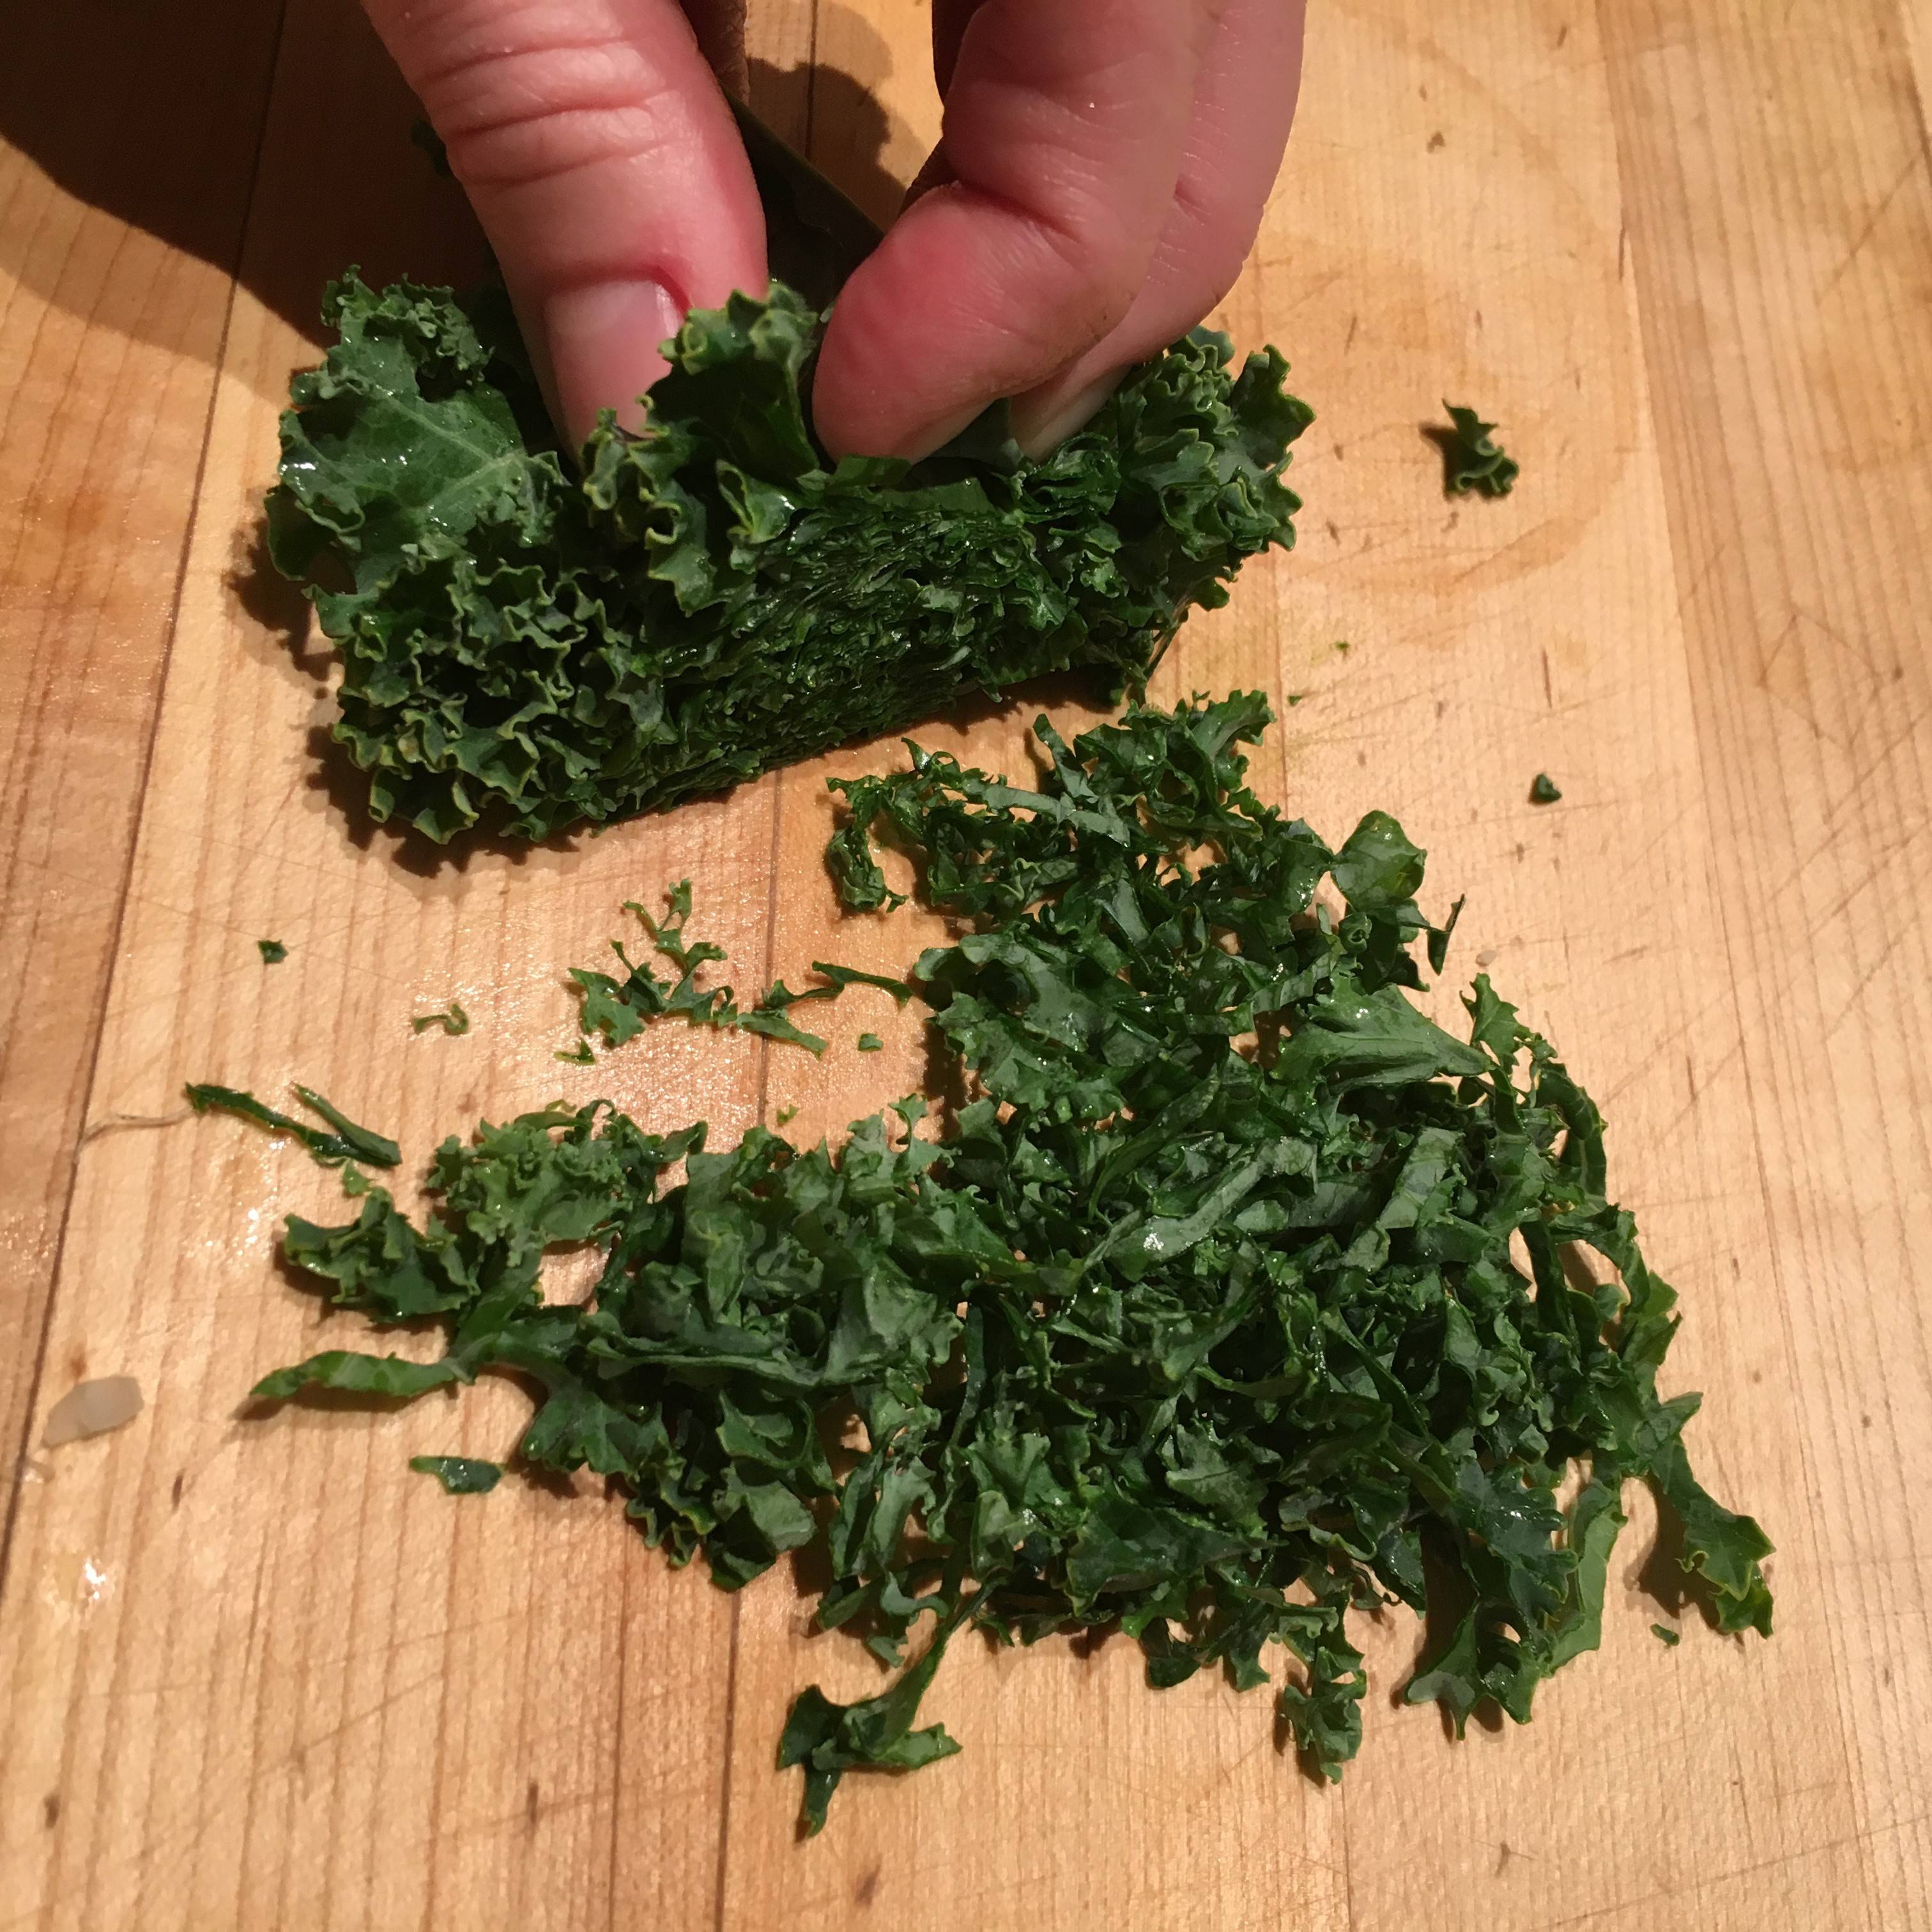
This is one of my favorite salads. With Kale being one of the highest nutrient rich foods (and ANDI score of 1000), I try to squeeze this in my dinners as often as possible. The most important thing with kale is that you can’t have it dry, it really needs a lot of love, which translates to oil! First you needs to make sure your kale is washed, which sometimes, takes wiping down the front and back of every leaf. You then need to completely dry it, because as well all know, oil and water don’t mix. Next you have the remove larger ribs that run down the center. Then you cut all of the leafs off. Try to keep them in large pieces. You then stack a series of leaves and roll them, like rolling a cigar. You will have a tightly wound up spiral of leaves. You then cut ⅛” thick (or thin) so you have small strands of leaves, like in photo above. Once all of the leaves have been nicely cut into thin and long pieces, place them into a bowl. Now you give it some love, pour in the EVO Oil into a bowl and toss around so that all of the pieces get a nice coating of oil, this is what softens it up. Next add apples, dried cranberries, chopped sweet almonds, pecorino and toss well to cover all ingredients in oil. Your last step is to add the Japanese red pepper (Togarashi). I would add this slowly, then toss around and see how much is enough for your individual taste. Some people love the red pepper spice, others have less tolerance for hot foods (like my husband). It does contain a bit of salt, so just keep tasting to see if you need additional salt in your salad.
Ingredients:
- Large bunch of Curly Kale
- 2 tbsp EVOO (olive oil)
- 1 Gala Apple (thinly sliced)
- ⅓ cup Dried Cranberries
- ⅓ cup Sweet almonds (chopped)
- ½ cup of shredded pecorino cheese
- ½-1 tsp Togarashi (Japanese Spice)
- ¼ tsp salt (optional)

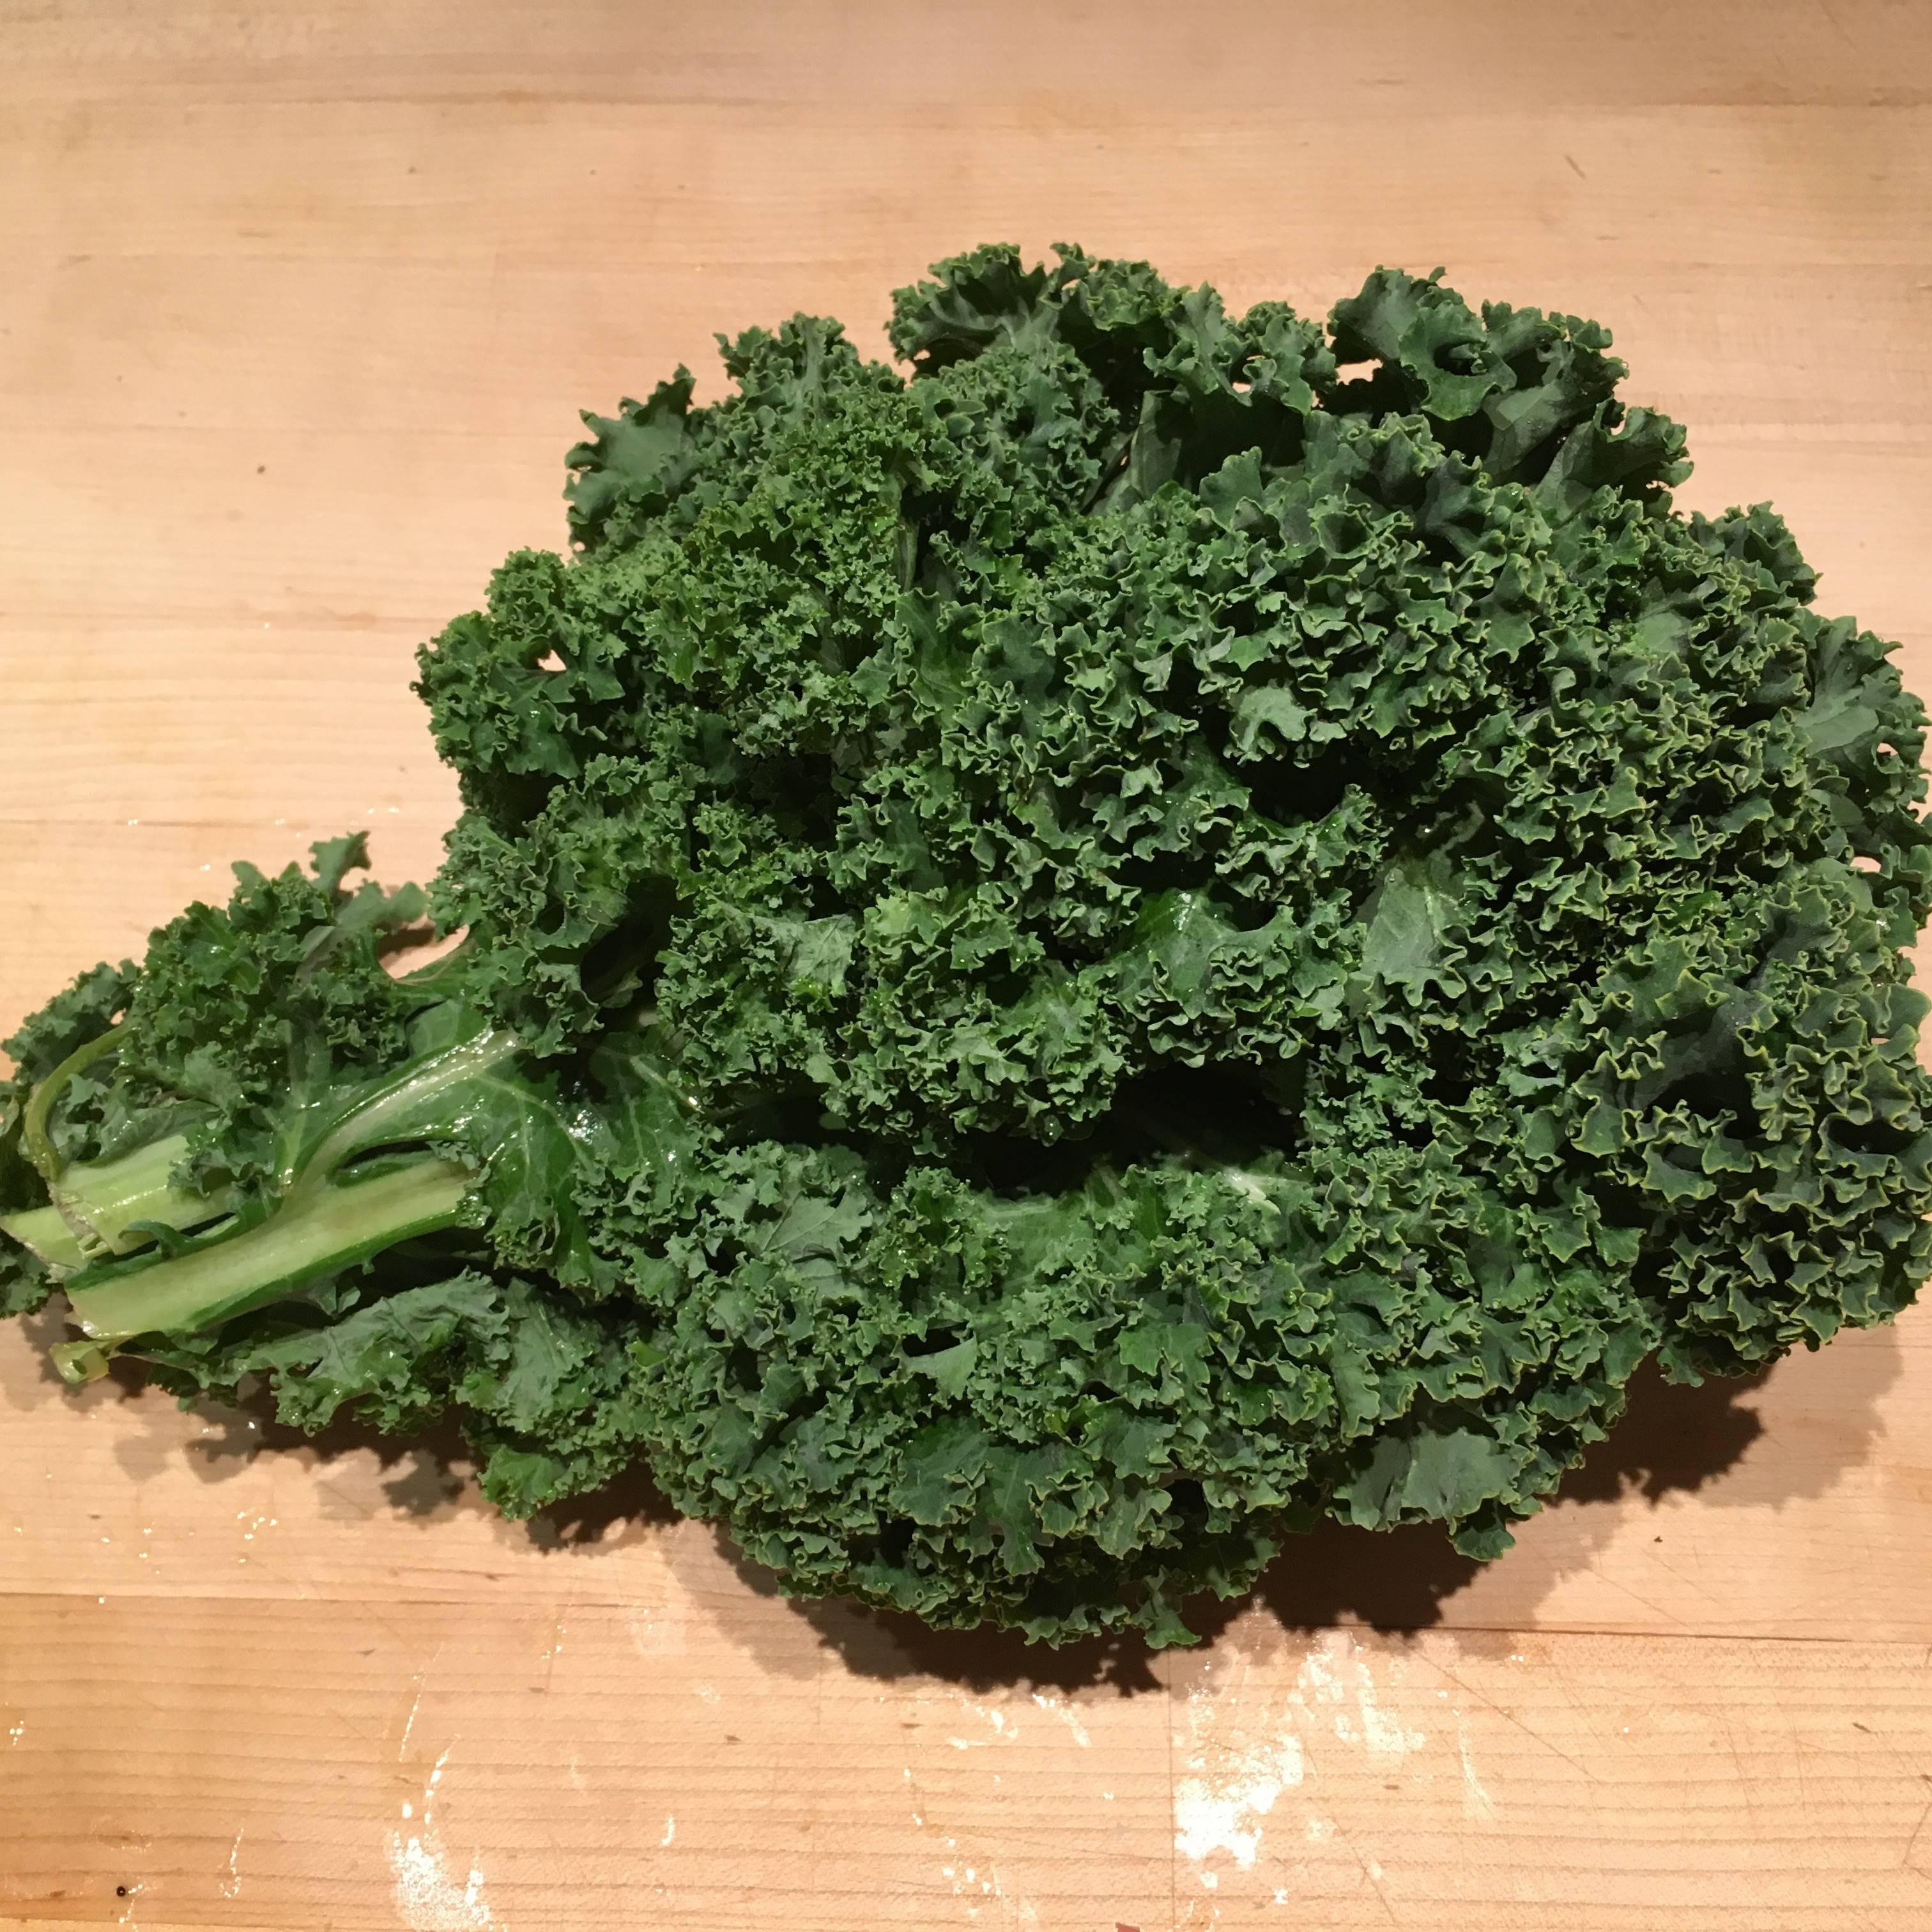
Curly Kale

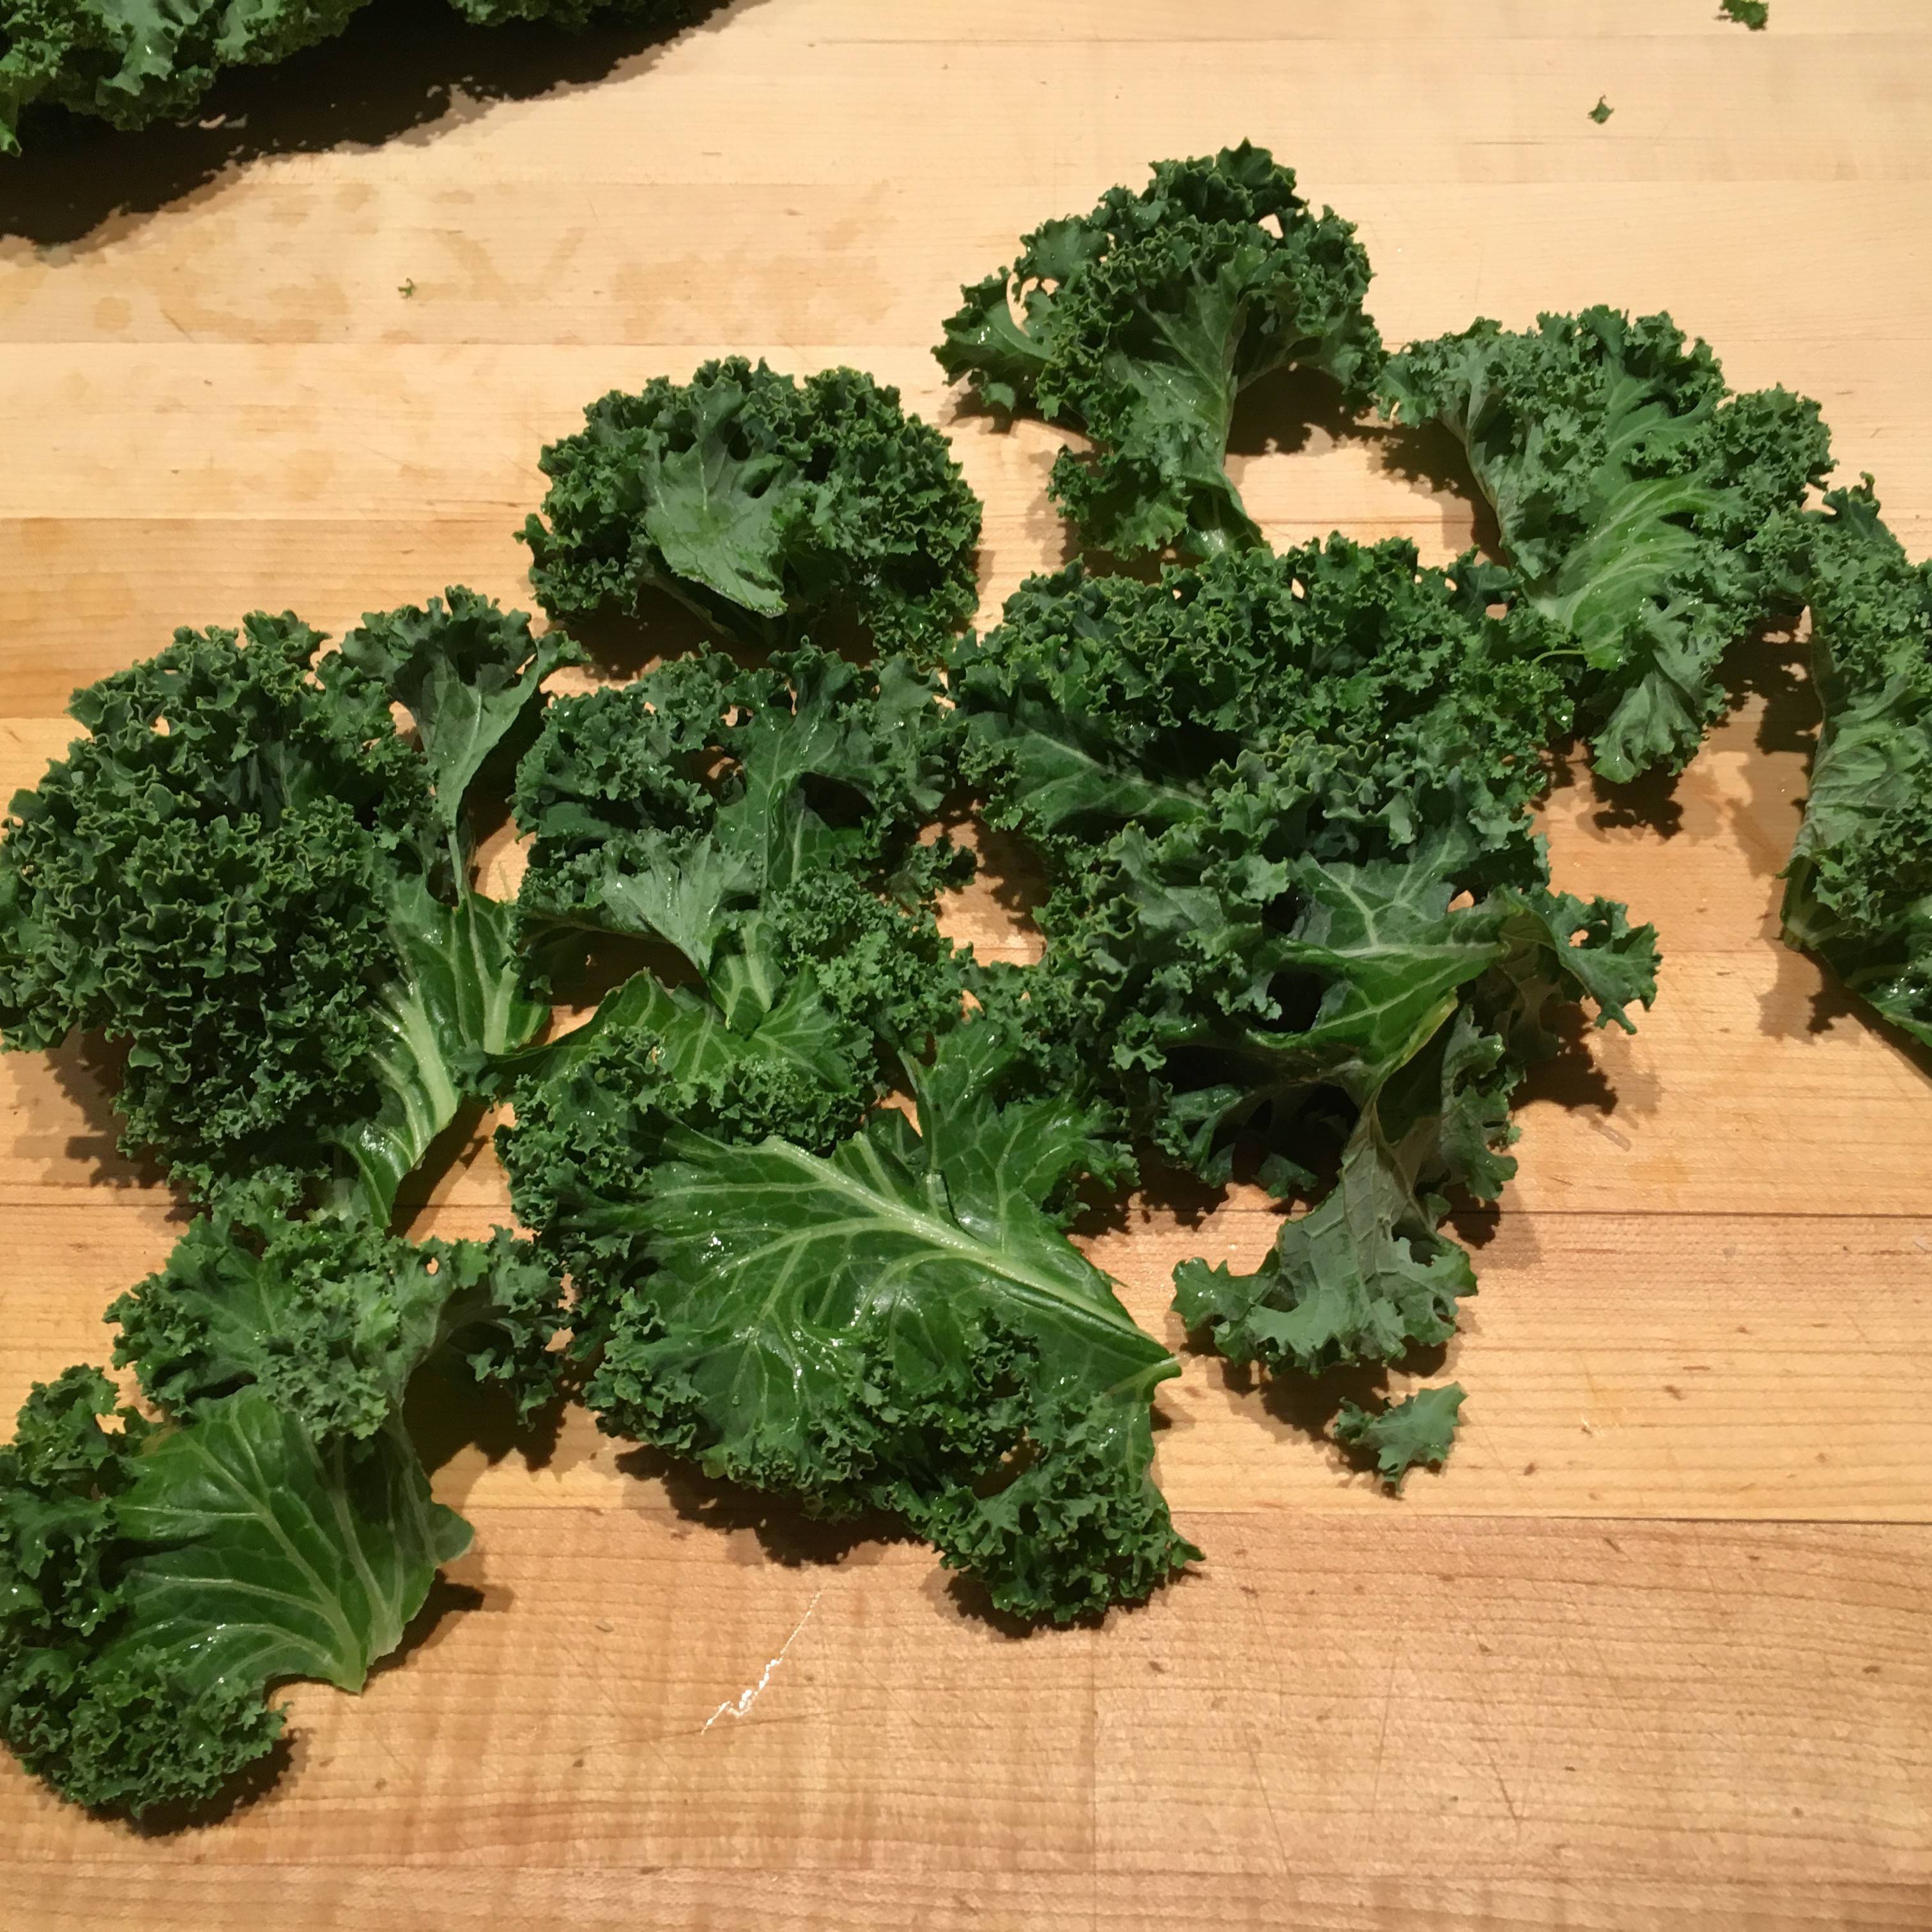
Kale with ribs removed

Rolled Kale leaves rolled
I also found some interesting information about Kale from Dr. Perlmutter (author of Grain Brain). I have included it here, but you can also visit this link to read the rest.
Kale, a member of the cabbage family, is power packed with vitamins A, K, C, with meaningful amounts of B vitamins as well as trace minerals. It’s low in carbs and calories. Kale is rich in a chemical called sulforaphane, and this may be one of kale’s most important health attributes.
Sulforaphane is a sulfur-rich chemical that activates a gene pathway in animals as well as humans called Nrf2, and when Nrf2 is turned on by consuming sulforaphane rich foods, several important health-promoting mechanisms are accentuated. These include a reduction in inflammation, enhanced antioxidant protection, and powerful amplification of our ability to detoxify potential damaging chemicals.

by zan@zeliciousrecipes.com | Salads, Sauces

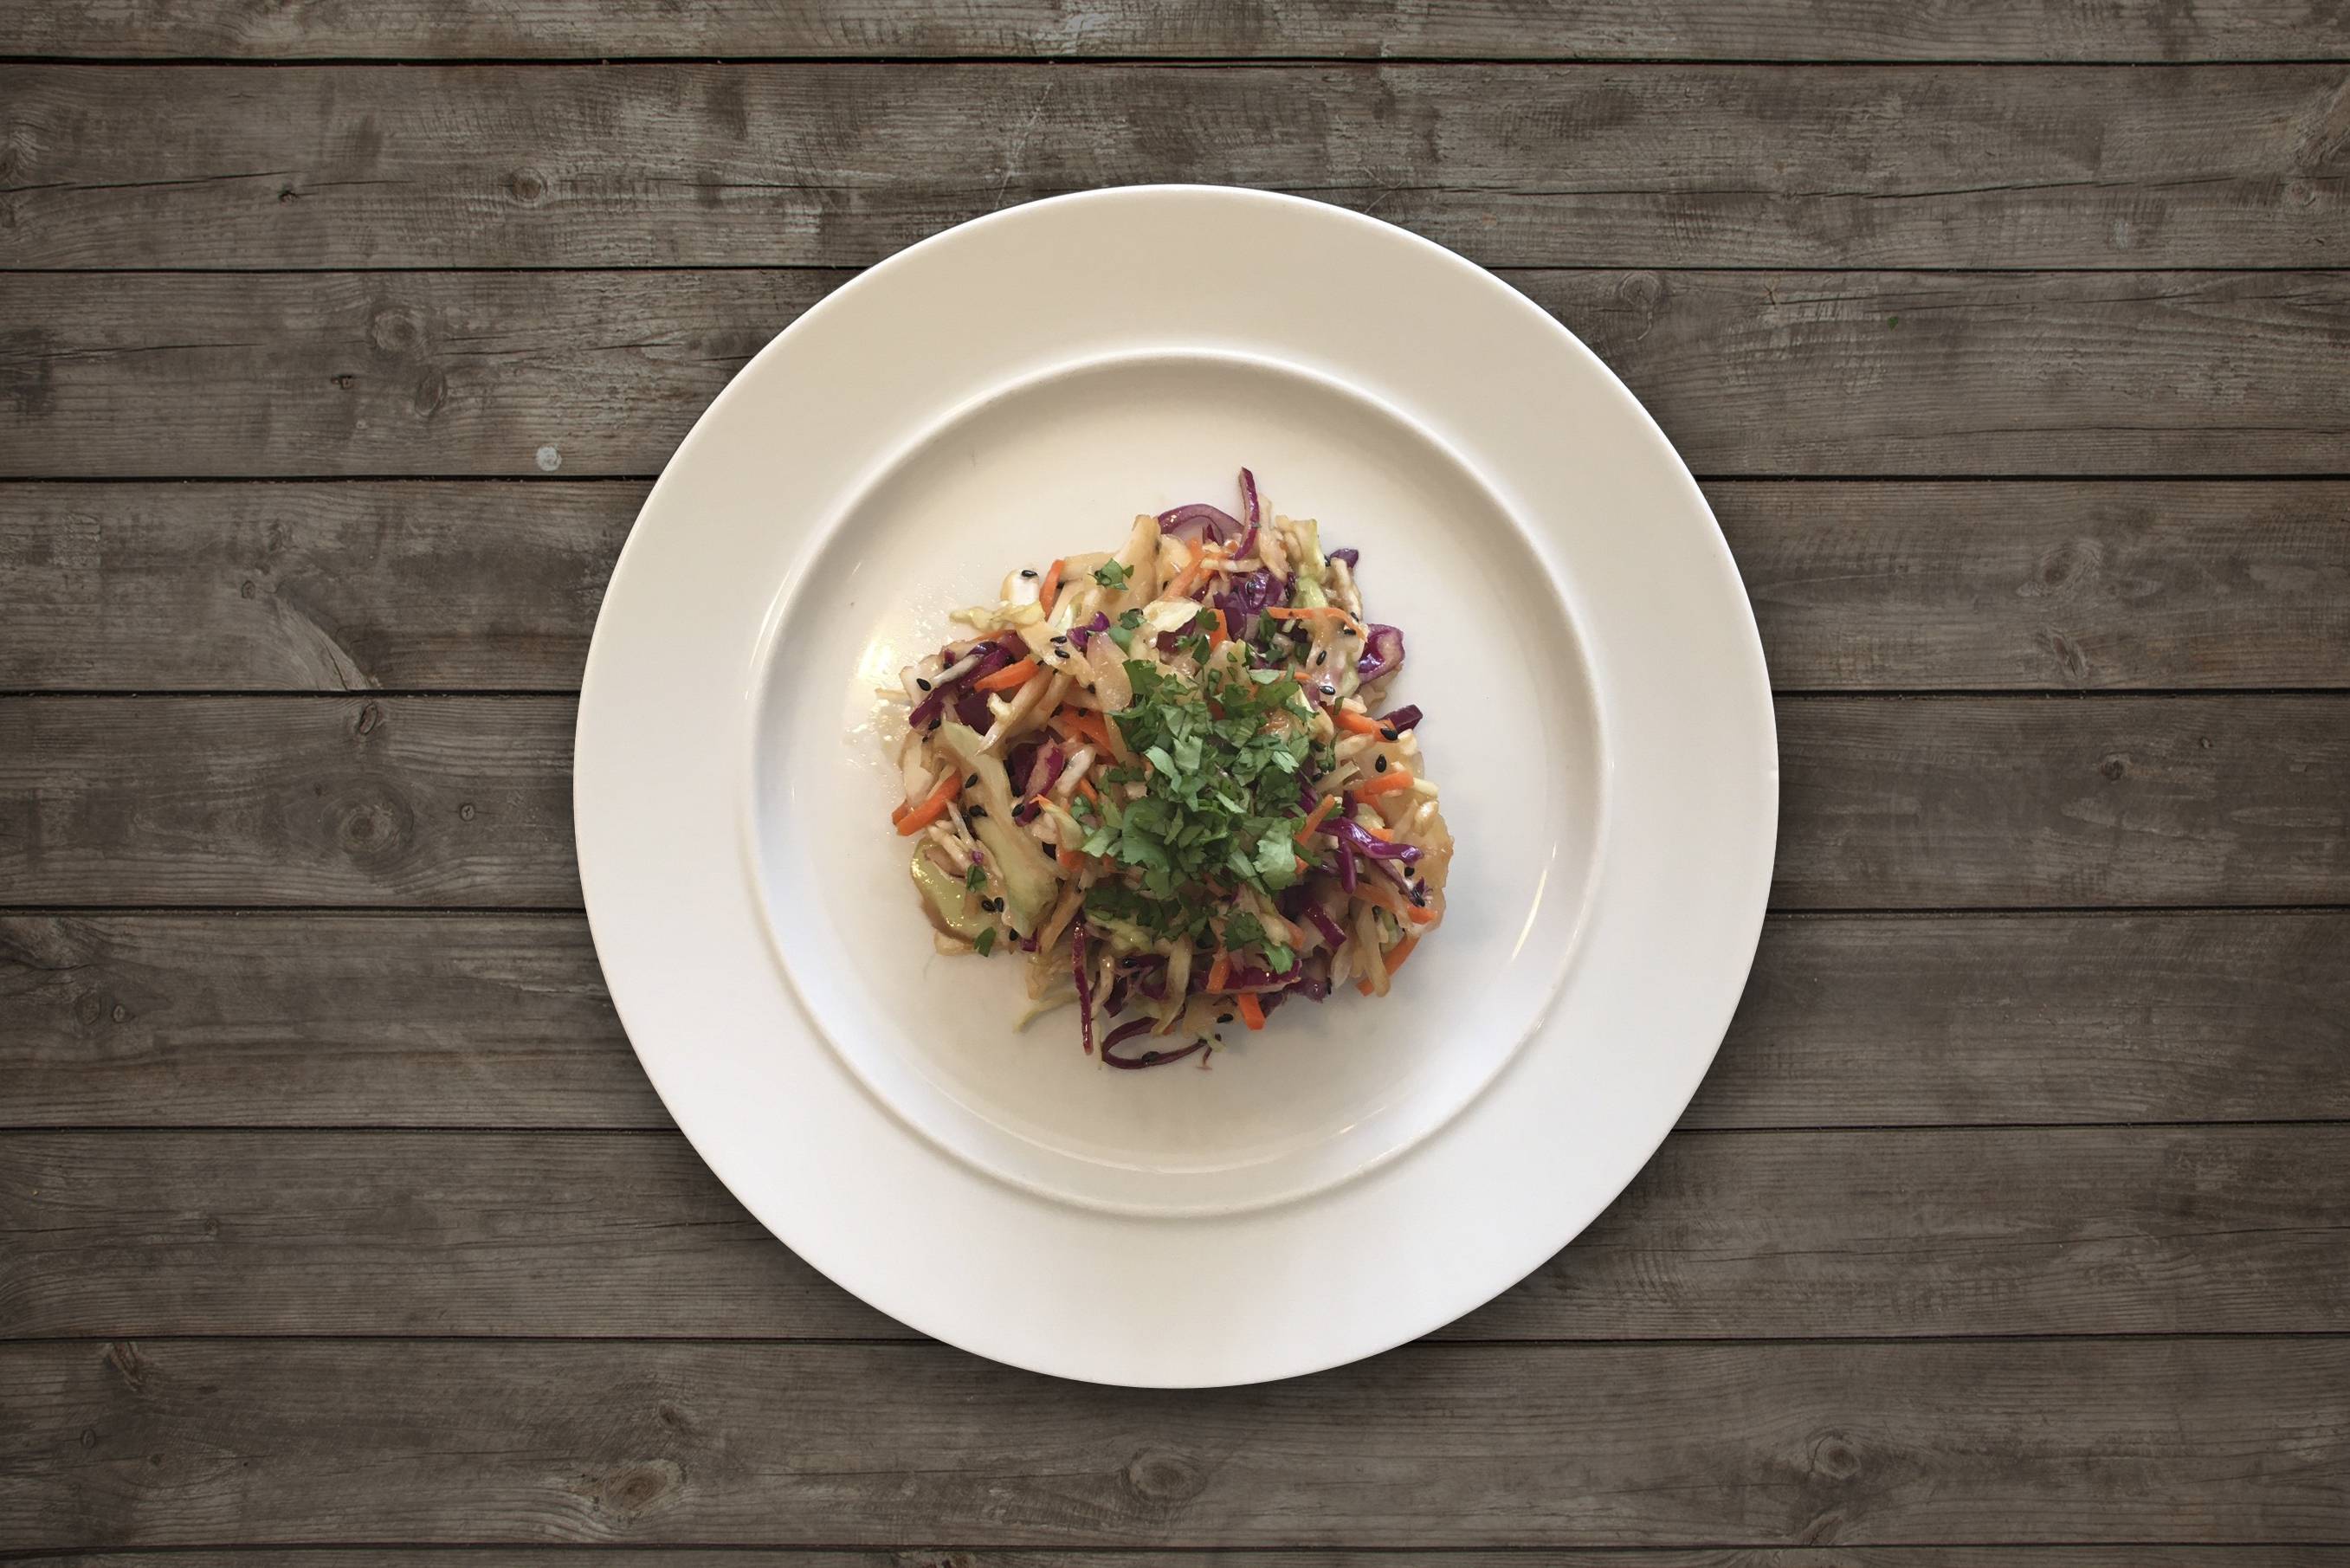
Asian Cole Slaw with Sesame Oil and Cilantro
Okay, I’ve honestly had enough of this summer heat! With 90+ degree weather for the past couple of months, I thought I would share a light, refreshing coleslaw recipe, to cool you down. This dressing is a little sweet and pungent. Pairs nicely with a Panko Crusted Tuna.
Ingredients:
- ⅓ cup soy sauce
- 1 tbsp lime juice
- 2 tbsp brown sugar
- 1 tbsp fresh pureed ginger
- 1 tbsp minced garlic
- 4 tbsp Mirin*
- 2 tbsp Toasted sesame oil
- ¼ cup Organic Canola Oil
* Mirin is a rice wine, similar to sake, but with a lower alcohol and higher sugar content.
Directions: In a mixing bowl, place soy sauce, lime juice, brown sugar, ginger, garlic, and Mirin and whisk until brown sugar dissolves. Slowly whisk in the oil to the mixture in a slow stream, waiting for the oil and mixture to begin thickening before adding a little more oil. This is to ensure emuslification. Add to the slaw and refrigerate, this can be made a few hours before serving.
For the Cole Slaw:
Ingredients:
- 1 cup thinly sliced napa cabbage
- 1 cup thinly sliced green cabbage
- 3/4 cup julienned carrots
- 2 tbsp. cilantro, chopped
- 1 tsp black sesame seeds
Directions: If you don’t have the patients to hand slice/chop all of the ingredients, you can use a food processor with the slicing or julienne blades. Mix the cabbages and carrots into a bowl, slowly add in the dressing, tossing to cover. Add in the cilantro and sesame seeds and toss. This can be served with a nice panic crusted seared tuna and sushi rice. You can also make a bit more of the above dressing and add it to the Tuna and rice.

by zan@zeliciousrecipes.com | Favorite Recipes, Pastas, Sauces

Okay, since I’m mostly Swedish, I cannot claim to have a perfect Italian Risotto, but my psuedo-Italian husband can! He definitely “thinks” he’s Italian, especially since he spent a number of year in Italy. Being green-eyed and blond-haired, the Italians always questioned his origin… it’s actually Michigan! Nevertheless, after many years, I can honestly say he has mastered the classic Italian risotto. And according to my children, I am incapable of making his perfected recipe. I actually don’t mind handing over the kitchen to him once in a while, so HE can “slave over the hot stove”.
The key to an honest Risotto, is definitely the broth, (my recipe can be found here). You also need to make sure you use Arborio rice. It is an Italian short-grain rice, named after the town of Arborio, in the Po Valley, which is situated in the main growing region. When cooked, the rounded grains are firm, creamy, and chewy if cooked just right. The key is cooking then stirring, cooking then stirring, a labor of love for sure.
Ingredients:
- 2 tbsp butter
- 1 tbsp olive oil
- 1 ½ cups finely chopped onions
- 2 cups Arborio rice
- 2 cups of dry white wine
- 5 cups of homemade broth
- pinch of saffron strands
- 2 cups of freshly grated Parmigiano Reggiano
Warm the broth in a pot on low heat, making sure it does not boil. In a large sauce pan on medium heat, add oil, butter then onions and sauté for several minutes until they become translucent. Add in the Aborio rice and stir to coat. Now here comes the hard part, you are going to add in the liquid 1 cup at a time and stir to cook. Start with the wine, as you want this to cook down over time, then alternate with the broth. You’re going to keep adding in the liquid one cup at a time for at least 20 minutes, maybe more. The point is to add the liquid in small doses, and stir it as it absorbs. When the rice starts to get a little puffy you want add in the strands of saffron. Stir for a couple of minutes, and then start tasting it. You want the rice to be firm, but not hard in the center. Once you get the right consistency, get your warm plates and ladle ready, add in the parmesan cheese and stir. You might need to add a little salt at the end, but remember the parmesan cheese is quite salty. Now you ladle one large scoop onto each warm plate, and jiggle it around so flatten it out. Remember this is really rich, so please don’t make the portions too big. Think Italian size… not American portion. Sprinkle a little parmesan on top… Mangiare subito!

by zan@zeliciousrecipes.com | Favorite Recipes, Meats, Paleo, Sauces

I love to have bone/meat broth on hand at all times. Especially, when my husband makes his Italian Risotto. This broth is truly the key to the most hearty, deep and rich risotto. We also use the broth occasionally to flavor pasta, rice, or even broccoli. It’s also great for sauces! The little Italian ladies in the country-side of northern Italy would make this for my husband, when he came down with a cold so it has some amazing health benefits: containing minerals, healthy fats, collagen, amino acids, and more.
Ingredients:
- 3 beef bones (soup bones)
- ¼ cup olive oil
- 1 large chopped onion (or 2 medium)
- 8 chopped carrots
- 8 chopped celery stalks
- 3 bay leaves
- 1 tsp of salt (more if desired)
- 1 whole fryer chicken
- 1 ½ lb. beef (I used top round steaks)
Begin by roasting your soup bones. I like to set my oven to 375ºF and bake my bones and meat for about 30 minutes, or until they begin to brown. In a 20 quart stock pot add in olive oil and chopped onions, cook for 2 minutes, then add in the carrots and celery. Stir to coat with oil and cook for 5 minutes. Add in salt and bay leaves. Add in 12 cups of water (preferably filtered). Scrape the roasted bones into the pot along with any juices. Add in the chicken and beef. Add more water if necessary to cover bones, meats and vegetables. Cover the pot and bring to a boil. Skim off any scum. Reduce heat to a very low simmer and cook with lid slightly ajar, skimming foam and excess fat occasionally, for at least 8 but up to 24 hours on the stovetop. The longer you simmer it, the better your broth will be. Add more water if necessary to ensure bones and vegetables are fully submerged. Once the broth has cooled down, you’re ready to strain it and store it! Strain it through a fine sieve. Your broth will keep for up to a week in the refrigerator, or a few months in the freezer.


